

Batch Rendering Models with Blender
In this article, I’ll explain how to use Blender 4.0 to create renders of multiple models using Blender scripting. I’ll be using Kenney’s Hexagon Kit as the 3D assets, and rendering one image per model with one click of a button.
Setting up
Section titled “Setting up”-
Start by opening a new Blender project and importing all the models you want to render. In my case, I imported the GLB models.
-
Move all the models into one Collection so we can find them easily later. Rename the collection to something memorable - you will use this name later.
-
At this point, you can set up any lighting and reposition any of the models.
-
Set up the camera.
-
Position: The easiest way I found was to position the editor view in the correct position, and then use View > Align View > Align Active Camera To View.
-
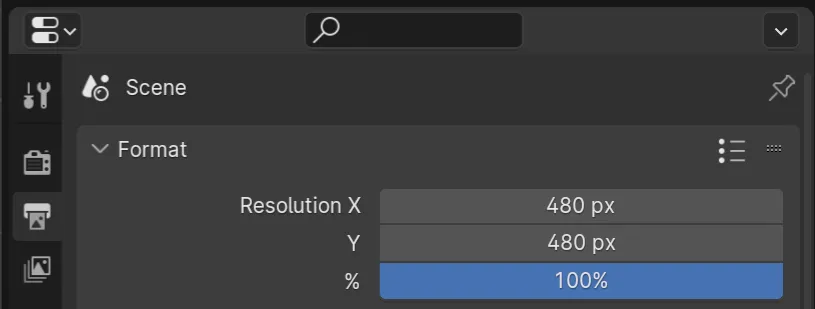
Render Size: Select any object in the scene. Select the Output tab in the Properties area, and change the dimensions of the output images here.
-
-
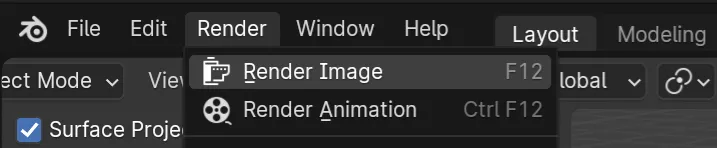
Check the results of the render using this menu option:
You may want to only render one object when testing the final result. Toggle off other objects using the camera icon in the Outliner area:

-
Once you’re happy with the render result, switch to the Scripting layout using the top bar and make a new script. Make sure you save your new file with the .py extension: Blender will not do this for you automatically.
Scripting
Section titled “Scripting”Full Script
Section titled “Full Script”import bpy, os
def set_render_self_and_children(object, show): object.hide_render = not show for child in object.children: child.hide_render = not show
dir_path = '/full/path/to/desired/output/directory'
objects_to_render = list(bpy.data.collections["YourCollectionNameHere"].all_objects)
for object in objects_to_render: set_render_self_and_children(object, True)
for other in objects_to_render: if object == other: continue set_render_self_and_children(other, False)
bpy.context.scene.render.filepath = os.path.join(dir_path, object.name + '.png')
bpy.ops.render.render(animation=False, write_still=True)Breakdown
Section titled “Breakdown”import bpy, os- Importing Blender’s Python module, as well as the
osmodule to use in file path manipulation
def set_render_self_and_children(object, show): object.hide_render = not show for child in object.children: child.hide_render = not show- Defining a function with two parameters: an object in Blender, and a bool value indicating whether it should be rendered
- Setting the object’s
hide_rendervalue to the inverse of theshowargument - Iterating through the object’s immediate children and setting their
hide_rendervalues to the same; if your models have more complex structures, you may want to modify this to iterate through more than one level of children
objects_to_render = list(bpy.data.collections["YourCollectionNameHere"].all_objects)
for object in objects_to_render:- Using Blender’s API to access all objects in the collection created during the setup, and putting those objects into a list
- Iterating over the list; then, for each object in the list:
set_render_self_and_children(object, True)
for other in objects_to_render: if object == other: continue set_render_self_and_children(other, False)
bpy.context.scene.render.filepath = os.path.join(dir_path, object.name + '.png')
bpy.ops.render.render(animation=False, write_still=True)- First, enabling rendering for this object using the function defined above
set_render_self_and_children(object, True)
for other in objects_to_render: if object == other: continue set_render_self_and_children(other, False)
bpy.context.scene.render.filepath = os.path.join(dir_path, object.name + '.png')
bpy.ops.render.render(animation=False, write_still=True)- Turning off rendering for all objects except the one we’re currently looking at. In detail:
- Iterating over the list of objects again
- Doing nothing if we find the object we’re looking at in the outer loop
- Otherwise, preventing the object from rendering with the function defined above
set_render_self_and_children(object, True)
for other in objects_to_render: if object == other: continue set_render_self_and_children(other, False)
bpy.context.scene.render.filepath = os.path.join(dir_path, object.name + '.png')
bpy.ops.render.render(animation=False, write_still=True)- Setting Blender’s internal render filepath value to the target directory plus the model’s name and PNG extension
- Note that (unintuitively) you don’t pass an output path into the render function, the output path is set here completely separately
set_render_self_and_children(object, True)
for other in objects_to_render: if object == other: continue set_render_self_and_children(other, False)
bpy.context.scene.render.filepath = os.path.join(dir_path, object.name + '.png')
bpy.ops.render.render(animation=False, write_still=True)- Calling Blender’s render function
- Ensuring that the rendering process doesn’t pull data from the animation ranges in the scene by setting
animationtoFalse - Setting
write_stilltoTrueso that the render writes to an external file at the path set earlier
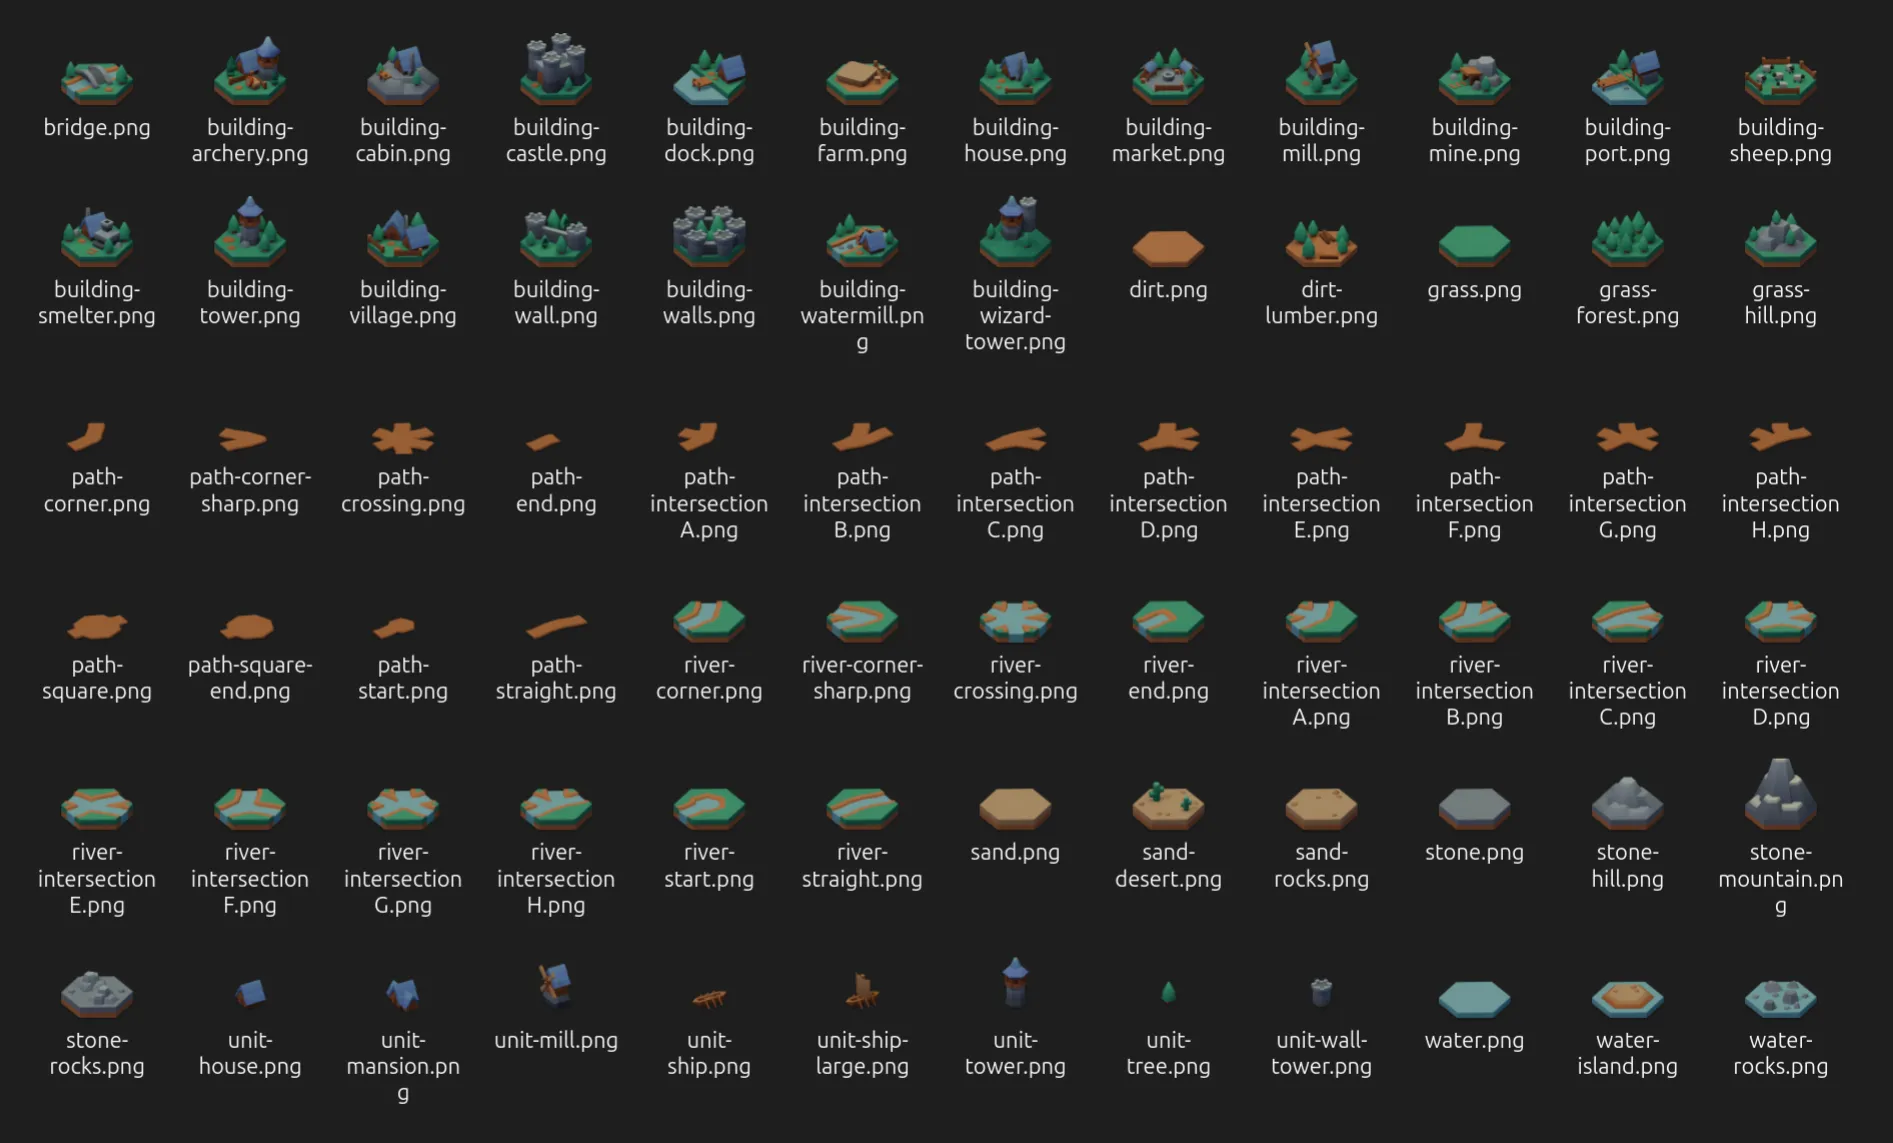
Example Results
Section titled “Example Results”

Before
After